Sunday, July 24, 2011

Faux Deer Head

Oh Dear, I love this Deer Head. 

I've been inspired by paper mache lately.  I really love how you can make anything you want out of newspaper.  On etsy I have seen some really cool faux deer heads.  My room has been needing something quarky and fun.  I decided a faux paper mache deer head was the right way to go.  I started out crumbling newspaper into balls and using masking tape to secure them to eachother.  I rolled newspaper up for the horns. To secure the horns to the head I hotglued them and taped them.  After taping my deer head looked like this.
I then paper mached wrapping paper onto the deer head.  I used one bottle of watered down glue.  I did 3 layers. Here is the final product:
* The whole project cost less than $3.  I bought the wrapping paper for $2 from Tuesday Morning.  The glue was 40 cents at Target.

Saturday, July 16, 2011

Sweet Summer Time

It is summer time. What does that mean? Picnic season.  Grab your picnic basket, flowers, and some books and head out to the nearest park to enjoy some sweet sunshine.


Sunday, July 10, 2011

Flower Wall Decor


I have been staring at cardbaord cereal boxes and wondering what to do with them. I love all the different shades of brown and gray. When it finally hit me that I should make a wall decoration.  I cut the boxes into squares and rectangles.  I layed them out on the floor and changed them up until I found a design I liked. 


 I hot glued the cardboard together, then I made the book page flowers.

Book Page Flowers:
I took an old Readers Digest and tore out pages.


Next I folded the paper in half vertically and cut out a leaf.


I then applied a drop of glue onto the edge of the leaf and clothespinned it.


After the petal is glued repeat on more petals and then glue together.
Final Product:

Finished Wall Decor:


Saturday, June 25, 2011

Blue and Pink: A table that is quite in sync


I was inspired by this website.  I love the idea of using napkins for flowers. I started by making numerous flowers, and then I decided where to put them. I decided to put some on my wall and the rest as flowers in vases.  If you don't have any napkins lying around your house, packs are less than a dollar at Walmart.  On the plates I folded napkins using this tutorial, and placed a flower in the middle of it. Enjoy!
linked to: http://todayscreativeblog.net/get-your-craft-on-15/

Friday, May 27, 2011

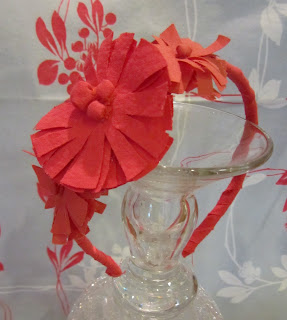
Headband

What do you do if you wake up late in the morning and you have no time to fix your hair? Put a headband in it! Go over to my etsy shop and check out my newest headband!

Check it out here!

Tuesday, May 24, 2011

She sells seashells by the sea shore

Summer=Seashells.  Here is my take on a seashell tablescape:


What I did:
  • For the background I took blue and white crepe paper and hung it from the ceiling.
  • For the name cards I took a toothpick and strung sand dollars onto it, and then taped a name I stamped onto the paper to the top of the toothpick.

Wednesday, May 11, 2011

Water Bottle Wreath

Water bottles are something that everyone has in their house.  When we are done with them we just throw them away.  I saw an Anthropologie window display made out of water bottle flowers.  I have been dwelling on what to do with these wonderful water bottle flowers and it turned out I needed a new Spring wreath for my front door.  Here are the instructions. Have fun and be creative.
Here's the end product:

Here's How:[anthroflower1.jpg]
After I cut mine I sprayed them with pink and yellow spray paint.


Wednesday, April 27, 2011

April Shower and May flower


I have been seening umbrellas everywhere! The other day I heard someone say the quote about April showers bringing May flowers.  When I heard that I thought that would be such a great theme for a table setting.  Here are some places I have seen umbrellas lately......


Heres my inspired umbrella setting...........


I tried to find a tutorial online to make paper umbrellas, unfortunately there was none. I had to come up with my own pattern.  I cut out a circle of scrap paper and fold it in half different ways about 5 times. After this I folded every other crease in.  This makes the top of the umbrella.  I cut a hole in the top and stuck a straw through.  I used white straws and spray painted them blue and green. After I got the top of the umbrella where I wanted it on the straw I put glue on the straw and clothes pinned the top to the straw until it dried.  When all the umbrellas were made I tacked up a string from one side of the ceiling to the other with some slack.   I then hung the umbrellas from it.
To make the napkin rings I took a toilet paper roll and cut it into 3 pieces.  I took each one and made a napkin ring out of them.  I first covered them with colorful scrapbook paper and then glued different flowers to each one.


**more detailed instructions to come**

Saturday, April 16, 2011

Easter Table

I am so excited to introduce my Easter Table.  I have taken tutorials from several blogs and combined all these great ideas to make one great tablescape.  Scroll down and enjoy!

I found this vintage tablecloth at a garage sale for $2.


Napking holder: Crepe paper flowers hot glued to ribbon and tied around a napkin. To make these awesome crepe paper flowers visit Dear Lillie.

I covered eggs with tissue paper and scrapbook paper.  All I did was cover the egg in Elmer's glue and then I cut out shapes from the scrapbook paper/tissue paper and placed them onto the plastic eggs.

Bunny Banner: Marth Stewart template cut out onto old wallpaper and attached to string.

Place cards: Brass candle sticks spray painted white.  Attached to the candle sticks is a place card made out of srapbook papers.  I placed  Easter eggs covered scrapbook paper ontop of the candle sticks.