Tuesday, May 24, 2011

She sells seashells by the sea shore

Summer=Seashells.  Here is my take on a seashell tablescape:


What I did:
  • For the background I took blue and white crepe paper and hung it from the ceiling.
  • For the name cards I took a toothpick and strung sand dollars onto it, and then taped a name I stamped onto the paper to the top of the toothpick.

Wednesday, May 11, 2011

Water Bottle Wreath

Water bottles are something that everyone has in their house.  When we are done with them we just throw them away.  I saw an Anthropologie window display made out of water bottle flowers.  I have been dwelling on what to do with these wonderful water bottle flowers and it turned out I needed a new Spring wreath for my front door.  Here are the instructions. Have fun and be creative.
Here's the end product:

Here's How:[anthroflower1.jpg]
After I cut mine I sprayed them with pink and yellow spray paint.


Wednesday, April 27, 2011

April Shower and May flower


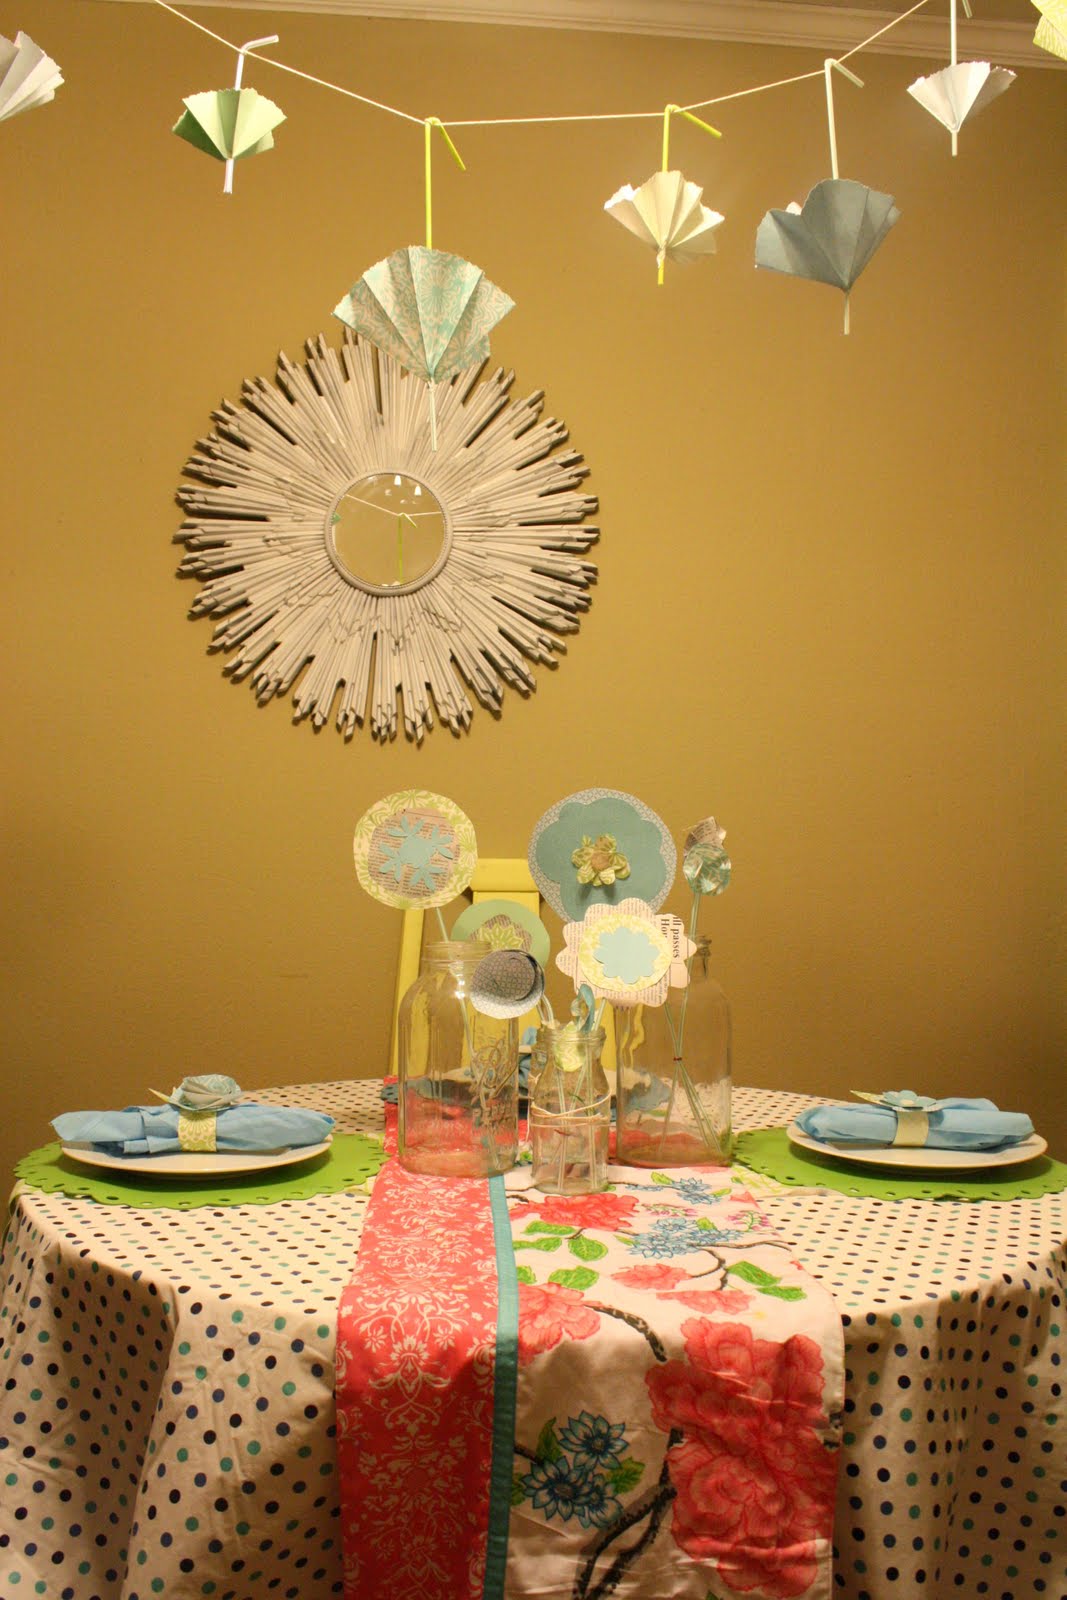
I have been seening umbrellas everywhere! The other day I heard someone say the quote about April showers bringing May flowers.  When I heard that I thought that would be such a great theme for a table setting.  Here are some places I have seen umbrellas lately......


Heres my inspired umbrella setting...........


I tried to find a tutorial online to make paper umbrellas, unfortunately there was none. I had to come up with my own pattern.  I cut out a circle of scrap paper and fold it in half different ways about 5 times. After this I folded every other crease in.  This makes the top of the umbrella.  I cut a hole in the top and stuck a straw through.  I used white straws and spray painted them blue and green. After I got the top of the umbrella where I wanted it on the straw I put glue on the straw and clothes pinned the top to the straw until it dried.  When all the umbrellas were made I tacked up a string from one side of the ceiling to the other with some slack.   I then hung the umbrellas from it.
To make the napkin rings I took a toilet paper roll and cut it into 3 pieces.  I took each one and made a napkin ring out of them.  I first covered them with colorful scrapbook paper and then glued different flowers to each one.


**more detailed instructions to come**

Saturday, April 16, 2011

Easter Table

I am so excited to introduce my Easter Table.  I have taken tutorials from several blogs and combined all these great ideas to make one great tablescape.  Scroll down and enjoy!

I found this vintage tablecloth at a garage sale for $2.


Napking holder: Crepe paper flowers hot glued to ribbon and tied around a napkin. To make these awesome crepe paper flowers visit Dear Lillie.

I covered eggs with tissue paper and scrapbook paper.  All I did was cover the egg in Elmer's glue and then I cut out shapes from the scrapbook paper/tissue paper and placed them onto the plastic eggs.

Bunny Banner: Marth Stewart template cut out onto old wallpaper and attached to string.

Place cards: Brass candle sticks spray painted white.  Attached to the candle sticks is a place card made out of srapbook papers.  I placed  Easter eggs covered scrapbook paper ontop of the candle sticks.


Thursday, April 14, 2011

Shirt Refashion: Shirt to Vest

 I found this shirt that I liked on the rack, but when I tried it on it gaped awkwardly in the front. I really liked the print and the ruffles and couldn't seem to part with it. It was on super clearance for $2 so I went ahead and bought it, knowing I could refashion it.


I couldn't pass up such a great deal.


Before

The fitted back and gaping front reminded me of the way vests fit. So what did I do? Cut up the middle of the front of the shirt to make a vest. I thought it would be as simple as that- cut and hem. But I was wrong. The front fell really weird. However, I somehow accidentally realized that if I did a basting stitch and then gathered up the seam, it would bunch up, pulling the front of the vest forward more. That also gave it a little ruffle on the hems. Here are the results:

Just Normal                                                                                                     Belted


Tuesday, April 12, 2011

belt re-do

I had seen a belt that I really liked at J. Crew.  I found this belt at a thrift store for less than a dollar, and I figured I could work some magic on it.
After:
How to: I used some ivory fabric, and two different kinds of lace.  For the two pieces of lace I twisted them and then wrapped it around. For more explicit details visit http://www.youtube.com/watch?v=BR0wHMvWTzo.  For the ivory flower I took a strip about 2" wide and a 8" long.  I cut slits about 1/4" from eachother, and then I rolled it and fluffed.  After I finished making all the flowers I hotglued them onto the gold buckle of the belt.

Friday, April 8, 2011

DIY frame

One day I was painting outside and a twig fell into the paint bucket.  I took it out and I liked the way it looked.  Pretty soon I was throwing all the twigs I could find into the paint bucket.  Then the question was: What to do with all these paint covered branches. Answer! Use one of my many picture frames laying around! I love how it turned out, I hope you do too.

Materials:
  • Paint
  • Picture Frame
  • Twigs
  • Fake flowers
  • Plaster of Paris
Drop the twigs into the paint and set them to dry on a plastic surface (I used a plastic grocery bag).
Drop the flowers in the plaster of paris and let them dry.
Glue the covered twigs and flowers onto the frame.


linked to: